 |  |  |  |
|---|
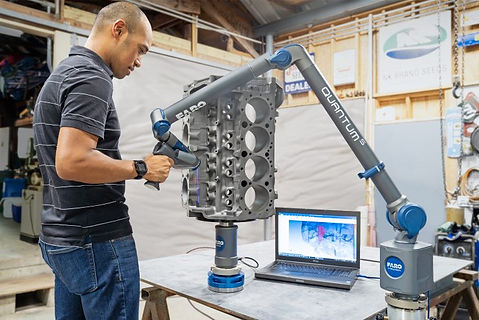
FARO Quantum Scan Arm
The All-In-One Contact/Non-Contact Portable Precision Scan Arm
Through simple plug-and-play, users can attach a FAROBlu™ Laser Line Probe to the FARO Quantum FaroArm®, creating an all-in-one measurement solution: The Quantum ScanArm.
The hard probe and the FAROBlu Laser Line Probe can digitize interchangeably without having to remove either component. Users can digitize simple features with the Arm’s hard probe and seamlessly scan across diverse surface materials regardless of contrast, reflectivity or part complexity without any special coatings or target placement.
The FAROBlu or PrizmTM Laser Line Probe can be used in conjunction with the FARO 8-Axis Quantum FaroArm, the first – and only – eight-axis portable metrology solution available on the marketplace. The resulting FARO 8-Axis Quantum ScanArm offers a comprehensive, contact/non-contact metrology solution, which allows users to significantly speed up and simplify their measurement and scanning activities. This is due to the limited device movements required to reach the features of interest and the reduced need for relocation of the measuring device to different positions around the object to be measured.
The accuracy specifications for the complete Quantum FaroArm product line with FAROBlu or PrizmTM are certified according to ISO 10360-8 for non-contact CMMs. FARO is the first portable measurement arm manufacturer to publish its non-contact accuracy specifications according to this standard.
The benefits of the Quantum ScanArm include:
-
Fast Scanning Speed – The extra wide scan stripe and fast frame rate boosts productivity by increasing coverage and reducing scanning time. Combined with the eight-axis rotation of objects in real-time, the scanning process itself is even faster.
-
Scan Challenging Materials – Seamlessly scan across diverse surface materials regardless of contrast, reflectivity or part complexity without any special coatings or target placement.
-
High-Definition Data – Intricate components can be captured in fine detail as a result of the 2,000 actual points per scanline (FAROBlu HD) and the FAROBlu Laser Line Probe featuring noise reduction technology.
.jpg)
.jpg)
-
Color Scanning – RGB information and color point cloud data allow users to document, analyze and manipulate detail rich, 3D color point clouds (FARO Prizm) of a part or assembly on a computer screen. Proper decisions on the production floor can be made based on the availability of information not detectable with existing technologies.
-
High-Speed Wireless Operation – New sophisticated and robust electronic design delivers superior reliability and guarantees optimal wireless operation for scanning and probing, allowing unmatched reach across the manufacturing floor.
Expedited Post-Processing Activities
Due to reduced need to move the Arm to different positions around the part or move the part itself into several positions in order to capture all necessary features, a minimum number of scans need to be aligned. As a result, post processing activities are both simplified and completed faster.
With the FARO® 8-Axis Quantum FaroArm® the operator can focus on the measurement of the part with no worries about uncomfortably reaching around the part or assembly.
.jpg)
